


Magnetic Track Light Buying Guide: All Factors You Need to Know Before Purchase
Step-by-Step Magnetic Track Light Installation Guide (Surface Mount & Recessed)
Magnetic track lighting is widely adopted for modern no-main-light interior design. Many DIY homeowners, electricians and renovation contractors feel confused about correct installation steps between surface-mounted and recessed types. This complete installation tutorial covers preparation work, two mainstream installation methods, wiring rules, accessory splicing and common troubleshooting, specially customized for our 4.5mm ultra-narrow magnetic track system.
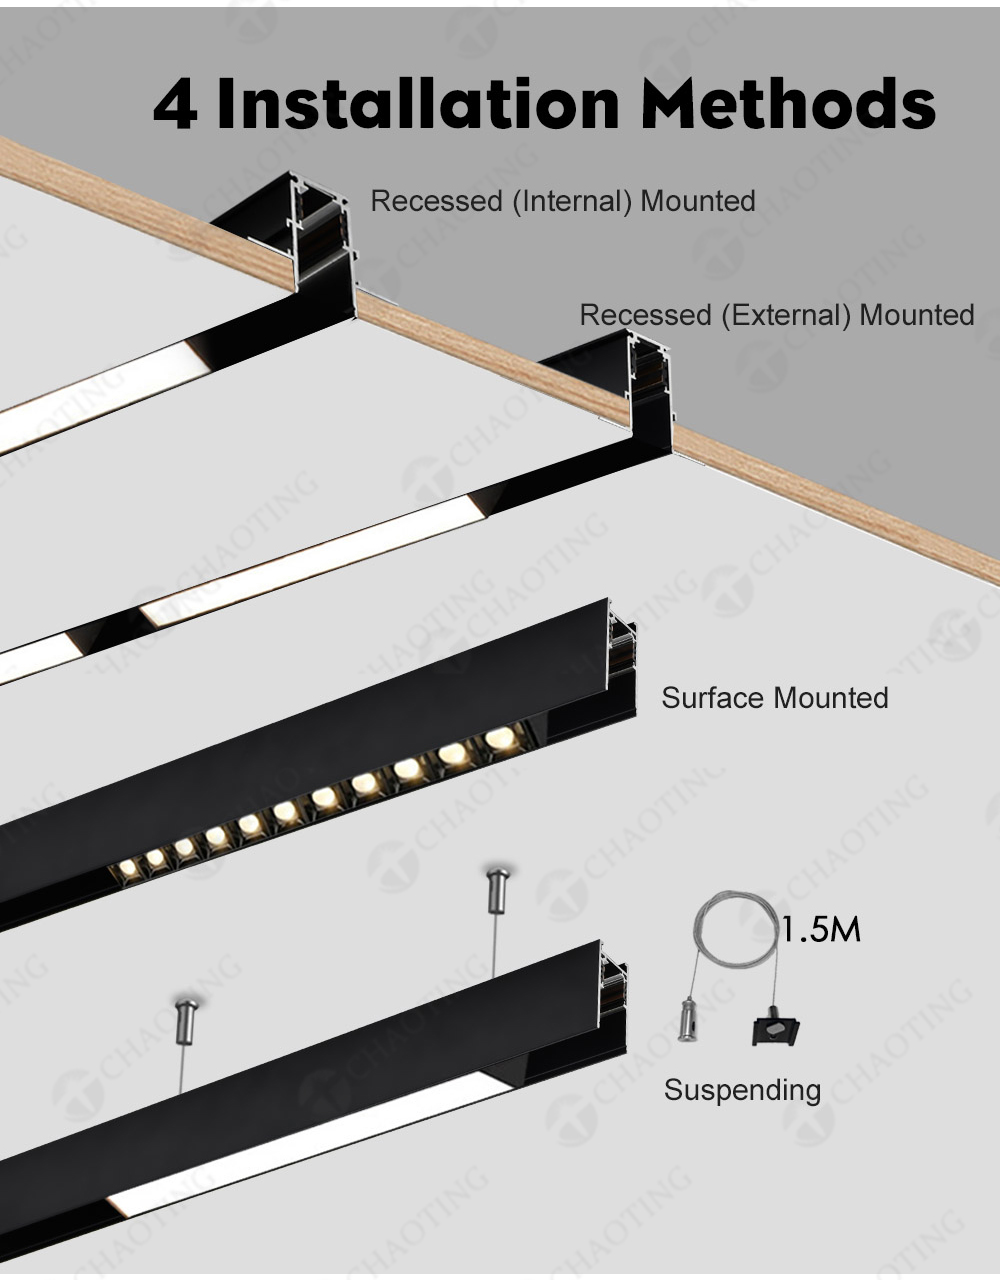
Picture 1: Four mainstream installation options for magnetic track light There are 4 common installation solutions: recessed installation, trim recessed installation, surface mount installation and suspension installation. We will focus on the most popular surface mount & recessed installation in this guide.
1. Pre-Installation Preparation
1.1 Tools & Components You Need
- Whole set: Magnetic track rail, 48V constant voltage transformer, input module, end caps, lamp modules (spotlight, linear light, grille light)
- Hardware: Expansion screws, drill, level ruler, wire stripper, insulating tape, measuring tape
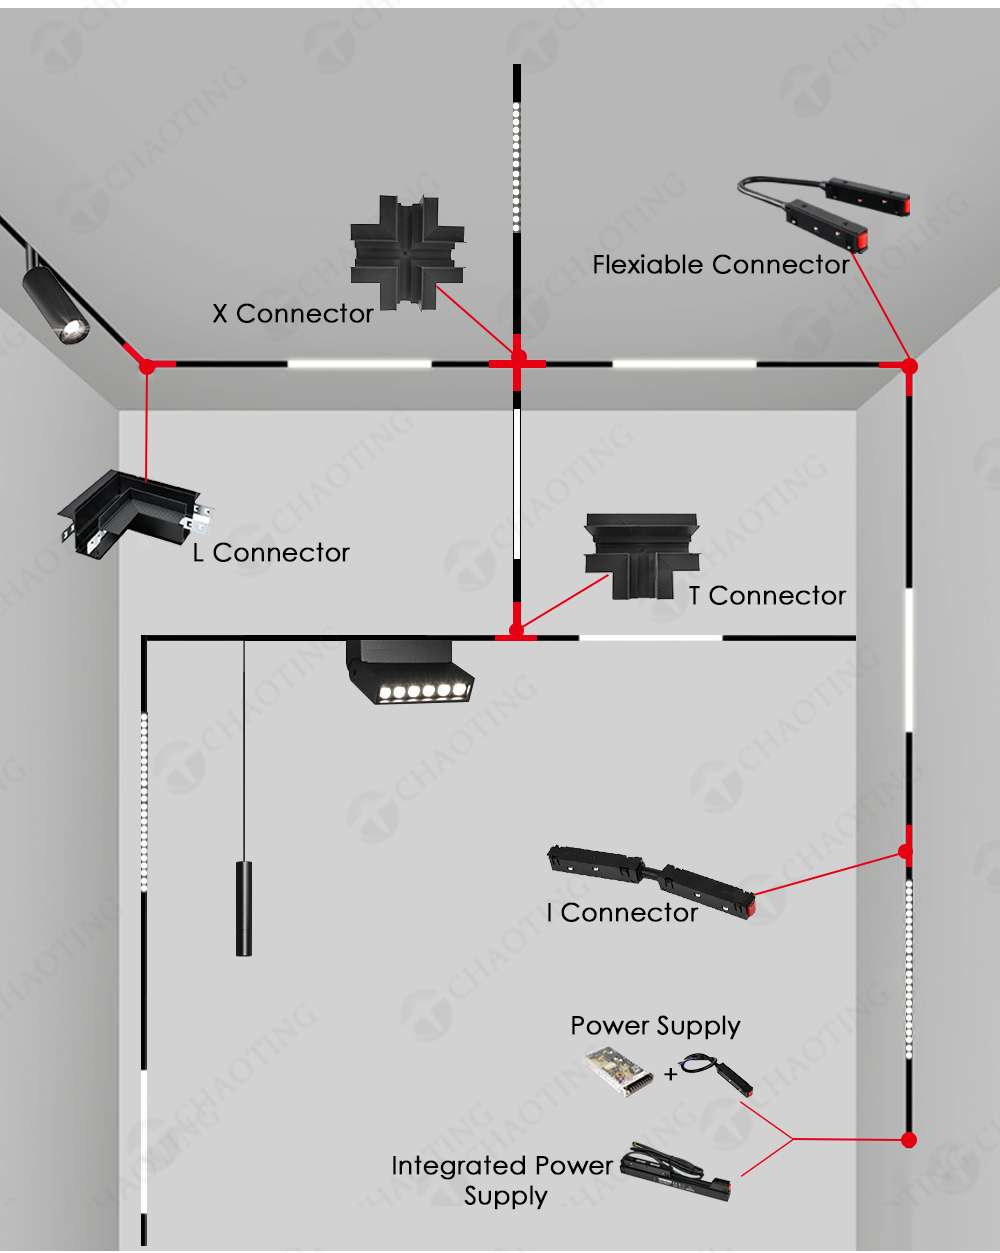
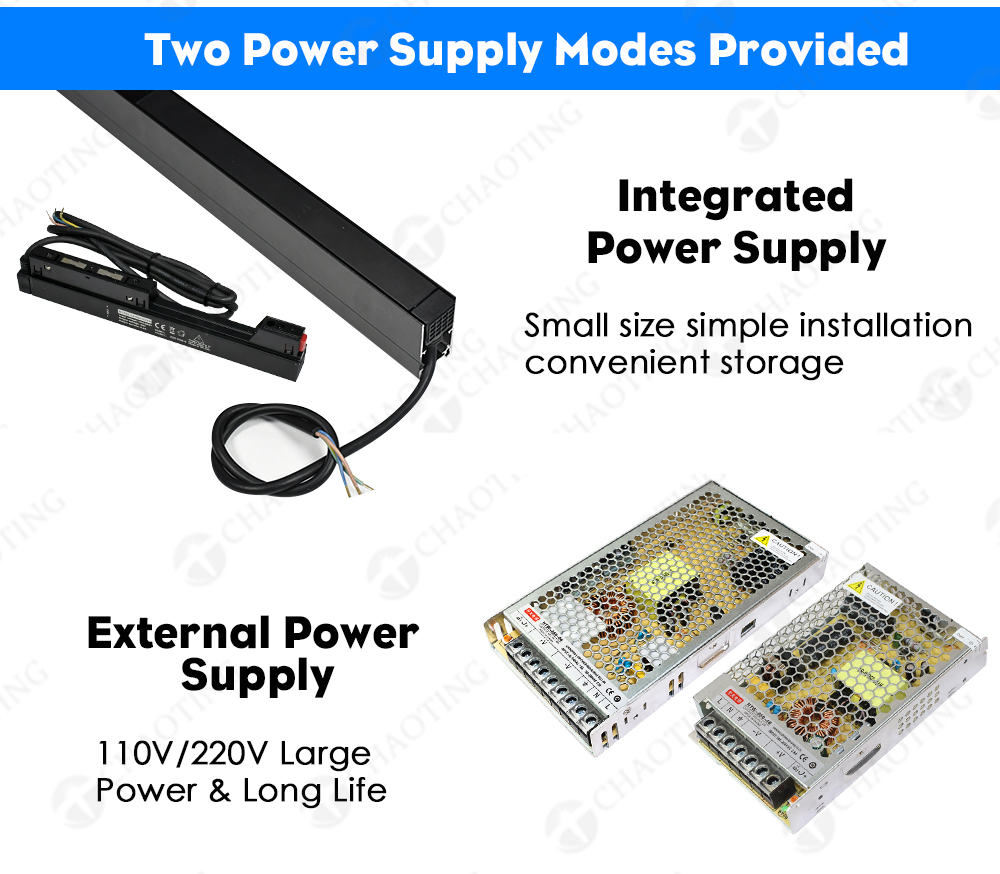
Picture 2: Complete magnetic track system matching accessories Including straight connector, 90° horizontal corner, vertical corner, power input module and 48V power supply for track combination layout.
1.2 Key Pre-Wiring Notice
Reserve 220V live & neutral wire at the track end position in advance. The transformer must convert 220V AC to safe 48V DC before connecting to the magnetic track, to meet EU CE safety standard. Never connect mains voltage directly to the track rail.
Picture 3: Transformer wiring principle (220V input, 48V safe output)
2. Method 1: Surface Mount Magnetic Track Installation (Best for Old House Renovation)
Surface mounting requires no ceiling slotting, ideal for finished apartments, low-ceiling rooms and renovation projects without ceiling modification.
Picture 4: Step drawing for surface mounted magnetic track installation
- Use measuring tape & level ruler to draw a straight reference line on ceiling, mark screw hole positions every 30–40cm
- Drill holes and install plastic expansion tubes inside ceiling holes
- Fix the magnetic track rail onto ceiling with self-tapping screws, keep the rail straight and flat
- Install end cap on one track end; mount power input module on the other side
- Connect transformer output wire to input module terminals, cover wire hiding cover
- Clip magnetic lamp heads onto track freely, switch on power to test lighting
Picture 5: Easy snap-in installation for magnetic lamp modules, tool-free disassembly & position adjustment
3. Method 2: Recessed Magnetic Track Installation (New House Minimalist Ceiling Solution)
Recessed track is embedded inside gypsum ceiling, flush with ceiling surface for seamless minimalist aesthetic, popular for villa whole-house customized lighting.
Picture 6: Step drawing for recessed magnetic track installation
- During woodworking ceiling construction, pre-reserve fixed slot according to track width & depth size (match our 4.5mm ultra-narrow track size)
- Fix magnetic track inside pre-made slot with screws, align multiple track segments with straight connectors if long length needed
- Install input module & end cap, pre-connect transformer wiring before gypsum board sealing
- Test light on state fully before sealing ceiling; confirm no flickering or poor contact
- Cover gypsum board, putty & paint the ceiling surface to make track flush with ceiling plane
- Install all magnetic lamp modules and finish final power test
4. Track Connection & Corner Splicing Operation
For L-shaped, U-shaped or irregular layout, use corresponding corner accessories to connect track segments:
Picture 7: Horizontal 90° corner splicing method
Picture 8: Vertical up-down corner splicing operation
- Straight long track: Use straight connecting piece + straight conductive module for seamless power conduction
- Horizontal 90° turn: Match horizontal corner fitting + angle conductive module
- Vertical up & down turn: Apply vertical corner connector to change track direction vertically
- Note: All joint positions must be tightly fixed to avoid poor contact and light flickering
5. Common Installation Mistakes & Troubleshooting
- Lamps flicker after installation: Check loose wiring of input module, insufficient transformer power load, or loose track copper strip inside
- Partial lamps not lighting up: Poor contact at track splicing joint, need re-fix corner/straight conductive modules
- Track overheating: Total lamp power exceeds transformer rated output, replace larger wattage driver
- Difficult to snap lamp heads: Deform track profile during installation, adjust track flatness again
6. After-Installation Maintenance Tip
Our 4.5mm ultra-narrow magnetic track adopts thickened conductive copper strip & anti-oxidation aluminum housing. Regularly wipe dust on track surface to guarantee stable contact. Individual lamp can be replaced separately without dismantling the whole track system for easy later maintenance.
For Bulk Buyers & Project Contractors
As professional Foshan magnetic track light manufacturer, we supply complete installation technical drawings, installation instruction manuals for bulk orders and engineering projects. We support customized ultra-narrow track size, private label packaging and OEM & ODM service. Contact our sales team to get detailed specification and wholesale quotation.
Search Articles
Blog Categories
Latest News

Magnetic Track Light Buying Guide: All Factors You Need...
Step-by-Step Magnetic Track Light Installation Guide...

Magnetic Track Light vs Traditional 220V Track Light: 7...
When planning lighting for residential, furniture stores,...

6-Wire Multi-Circuit LED Track Rail: Why It’s The Top...
6-Wire Multi-Circuit LED Track Rail: Why It’s The Top...


